How to set SVG as MathJax Output Format in jupyter notebook

I use jupyter notebook, as part of anaconda navigaor, in order to follow along data science tutorials, to make scientific reports, to make presentations with nbconvert, etc. It is really neat and very useful. For some reason, I’d prefer if the mathjax engine within jupyter rendered math equations as svg and not as span  which it does by default. I have done some research in order to change this which I explain here.

First, having statred a jupyter notebook in chrome, I opened View > Developer > View Source . By looking at the html markup, the mathjax javascript get fetched locally

path_mathjax_anaconda.png

which after some research turns out to be in my anaconda distribution folder (on mac) /anaconda3/lib/python3.7/site-packages/notebook/static/components/MathJax. By looking at /anaconda3/lib/python3.7/site-packages/notebook, I realized that jupyter notebook is actually a django web application, thereofore any customization of the app has to be done there. I don’t want to go down that road so not to break anything.

Doing more research, for instance through View > Developer > Developer Tools then clicking  the network tab and reloading the notebook (⌘+R in mac) followed by a search for mathjax or mathjax.hub.config,

devTool

devTools2

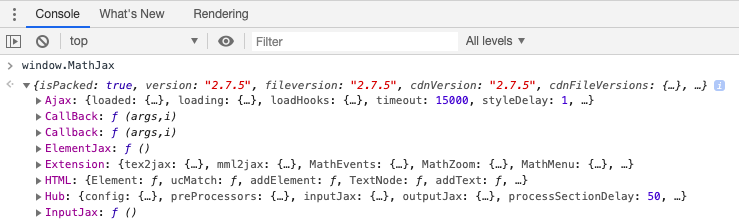
we can find any fetched ressource with the keyword mathjax in it. Looking inside these javascript ressources, one finds out about the window.MathJax global variable and how everything mathjax is stored in it. Type window.MathJax on chrome console to see for yourslef.

window.MathJax.png

Enough with mathjax investigation, let’s go back to our problem. One harmless way I use to set SVG as MathJax output format for an opended notebook (after mathjax has finished loading and typesetting) is by typing and executing the following javascript snippets on the console:

delete (window.MathJax);
var head = document.getElementsByTagName("head")[0];
var script;
script = document.createElement("script");
script.type = "text/x-mathjax-config";

script[(window.opera ? "innerHTML" : "text")] =
"MathJax.Hub.Config({\n" + 
"HTML: ['input/TeX', 'output/SVG'],\n" +
"jax: ['input/TeX', 'output/SVG'],\n"+
"tex2jax: {\n"+
"inlineMath: [ ['$','$'], ['\\(','\\)'] ],\n"+
"displayMath: [ ['$$','$$'], ['\\[','\\]'] ],\n"+
"processEscapes: true,\n"+
"displayAlign: 'center',\n"+
"}\n"+
"});\n"+
"MathJax.Hub.Configured();\n"+
"MathJax.Hub.Queue(['Typeset',MathJax.Hub]);\n"
head.appendChild(script);
script = document.createElement("script");
script.type = "text/javascript";
script.src = "https://cdnjs.cloudflare.com/ajax/libs/mathjax/2.7.5/MathJax.js?config=TeX-MML-AM_SVG&delayStartupUntil=configured";
head.appendChild(script);

Basically, we have deleted the global variable window.MathJax, then fetched mathjax from a cdn and configured it to output SVG. The method is inspired from Loading MathJax Dynamically.

This is a gross hack, however it has the merit of working and of not being persistent, a reload of the notebook (⌘+R in mac) gets you back to default mathjax configuration.

Latex macros in Jupyter notebooks

Macros are very usefull in Latex, they prevent typing tedious formula over and over again. For example, one can define a macros ‘\R’ for the the set of real numbers and use it instead of ‘{\mathbb R}’. In Jupyter notebook, this is also possible and it is fairly simple

  • In the first makdown cell of the notebook, type
    #### Some Tex macros
    $$ 
    \def\R{{\mathbb R}} 
    $$
  • Run the cell

You are set, mathjax will take it from there. Everytime, you use \R in a mathematics formula, it gets rendred as if {\mathbb R} was used. The ‘#### Some Tex macros’ is there so that one knows where to double click in order to add and modify the macros cell. This is because, everything between $$ … $$ get disaperaed when the cell is run. Also using many {{ }} is for extra tex-urity 🙂

Here are my favorite macros

Some Tex macros
$$ 
\def\A{{\mathbb A}}
\def\B{{\mathbb B}}
\def\C{{\mathbb C}}
\def\D{{\mathbb D}}
\def\I{{\mathbb I}}
\def\J{{\mathbb J}}
\def\L{{\mathbb L}}
\def\M{{\mathbb M}}
\def\O{{\mathbb O}}
\def\P{{\mathbb P}}
\def\R{{\mathbb R}}
\def\T{{\mathbb T}}
\def\U{{\mathbb U}}
\def\V{{\mathbb V}}
\def\Z{{\mathbb Z}}
\def\cA{{\cal A}}
\def\cB{{\cal B}}
\def\cD{{\cal D}}
\def\cI{{\cal I}}
\def\cJ{{\cal J}}
\def\cM{{\cal M}}
\def\cO{{\cal O}}
\def\cP{{\cal P}}
\def\cR{{\cal R}}
\def\cT{{\cal T}}
\def\cU{{\cal U}}
\def\cV{{\cal V}}
\def\[{\Bigl [}
\def\]{\Bigr ]}
\def\({\Bigl (}
\def\){\Bigr )}
\def\[{\Bigl [}
\def\]{\Bigr ]}
\def\({\Bigl (}
\def\){\Bigr )}
$$

Embed svg into jupyter notebook

In markdown cells of jupyter notebooks, you can embed markdown, html, latex formulas, code snippet, etc. Once you run the cell, everything gets rendered as html using the various engines (markdown engine, mathJax engine, etc), see markdown cells. In order to include an image named “logo.jpg” and located at the same directory of the notebook (*.ipynb) you are editing, you simply embed <‘img src=”logo.jpg” /> in markdown cell. It gets rendered exactly as html markup <‘img src=”logo.jpg” /> when the cell is run. I have tried the same with an svg image, but it does not get rendered although the documentation in markdown cells uses an svg image as an example. I have searched, found and tried many ways to force an svg into rendering. I will list some of them, each is more suitable to the user situation.  Markdown and code cells are differentiated using the grey and bisque colors.

  • Inline SVG: If your svg consists on few lines of markup, like drawing a line, a circle, etc, you can just embed it in the markdown cell as it is. The code below embedded in a markdown cell get rendered as a circle filled in green and with a black stroke.
    <'svg>
    <'ellipse style="fill:#00ff00;stroke:#000000;" cx="50" cy="50" rx="48" ry="48">
    <'ellipse>
    <'/svg>

    This method can be used with any svg markup, you can copy-paste the svg markup of an svg image created with inkscape or any other vector graphics editor and it would work. However if the markup consists on hundreds or thousands of lines, this would pollute the cell visually.

  • Using IPython.core.displayWe can embed an svg by calling the function SVG of this module inside a python cell, we execute the code
    from IPython.core.display import SVG
    SVG(filename='logo.svg')

    or

    from IPython.core.display import HTML
    HTML(''' <' img src='logo.svg' / > ''')
    

    This copy the svg markup of the image to the output cell and embed the svg image respectively.

  • Using cell magic: Built-in magic commands can also be used inside a python cell, the commands %%html reender the cell markup as a block of HTML and the command %%svg render the cell as an SVG literal. In order to render the image, we then copy-paste the svg markup inside the cell starting in a new line followoing %%html or %%svg.To list all the built-in magic commands, run a python cell with the command
    %lsmagic
  • Using Javascript : This is the most versatile way to embed an svg image into a notebook. We assume we have the markdown cell
    ....markdown markup....
    <'div id='svgWrapper'>
        <'img src='logo.svg'/>
    <'/div>
    ....markdown markup....

    But when we run the cell, the image does not get rendered. We can force the rendering by inserting and running a python cell below the previous with the code

    %%javascript 
    var wrp = document.getElementById('svgWrapper'); 
    var xmlhttp = new XMLHttpRequest();
    xmlhttp.onreadystatechange = function () { 
        if (xmlhttp.status == 200 && xmlhttp.readyState == 4) { 
            wrp.innerHTML = xmlhttp.responseText; 
        } 
    };
    xmlhttp.open("GET", 'logo.svg', true); xmlhttp.send();

    We are loading and inserting dynamically the svg markup inside the div element. We have used plain javascript. Since Jupyter notebook loads Jquery at starup, we can also use jquery. For example

    %%javascript 
    $.get('logo.svg',function (data) { 
        $('#svgWrapper').html(data); 
    });

    We can also use a library that handles svg such as snap.svg. We assume we have snap.svg.js at the same directory of logo.svg and the notebook. Then we run the cell

     ....markdown markup....
    <'div id='svgWrapper'><'/div>
    ....markdown markup....

    Since Jupyter use requirejs for modules loading, then we insert below and run the code cell

    %%javascript
    require(['https://cdnjs.cloudflare.com/ajax/libs/snap.svg/0.5.1/snap.svg.js']);
    Snap.load('logo.svg', function (data) { 
        Snap('#svgWrapper').append(data);
    });

All these approaches are similar to a large extent, we basically GET a resource and append it to the DOM. The preference should go for cross-browser methods. Finally, in order to export the notebook as html, pdf, etc, one must not forget to cut the code cells before exporting. With html however, the javascript code must be appended to the body of the exported html.


Create an Angular.js custom filter.

In AngularJS, filters are applied to expressions in view templates using the pipe syntax:

{{ expression | filter }}

For example the markup {{ ‘My Blog’ | lowercase }} format the string to lower case ‘my blog’. Filters can be chained using the syntax:

 {{ expression | filter1 | filter2 | ... }} 

Filters can also have arguments. The syntax for this is

 {{ expression | filter:argument1:argument2:... }}

For example, the markup {{ 1234 | number:2 }} formats the number 1234 with 2 decimal points using the number filter. The resulting value is 1,234.00. AngularJS comes with built-in convenient filters

  • currency: Format a number to a currency format.
  • date: Format a date to a specified format.
  • filter: Select a subset of items from an array.
  • json: Format an object to a JSON string.
  • limitTo: Limits an array/string, into a specified number of elements/characters.
  • lowercase: Format a string to lower case.
  • number: Format a number to a string.
  • orderBy: Orders an array by an expression.
  • uppercase: Format a string to upper case.

A quick introduction to AngularJS filters is found in w3schools.

Here we create two new useful filters:

  • titlecase: Format a string to a title case format.
  • encodeEntities: Format a string and replace the angle brackets < and > with ‘&lt ;’ and ‘&gt ;’ and the quotes ” with ‘&quot ;’.

I- Title Case Filter

The title case filter is used for example in the table of contents of a book. The first letter of every word in a chapter or section title get capitalized. A pronoun doesn’t get transformed, except if the title starts with. For example ‘a rise of a star’ get transformed to ‘A Rise of a Star’. The angularJS script for the filter is organized as

/*angular.js already referenced*/
angular.module('app', []); 
angular.module('app').controller('controller', controller);
angular.module('app').filter('titlecase', titlecaseFactory);

function controller($scope) {
  $scope.title='don quichote de la mancha by cervantes'
}

function titlecaseFactory() {
/* 
Helpers functions go here. We keep in mind that we should rule out 
pronoun such as 'and', 'on', 'of','by' ,'with', 'the', 'as', 'a', 
'de', etc from getting capitalized. We return the filter function 
that take a string as input and return a transformed output. 
*/
    return function (input) {
    // logic goes here
        return output;
    };
}

The filter is then used within the HTML using the markup

{{ title | titlecase }}

The code is given in the codepen below. The code is not exhaustive and optimal, not every pronoun is ruled out and the case of a string like ‘one-period’, that should get transformed to ‘One-Period’, is not treated.

Filters that transform strings are merely methods that get applied to strings. For example, the markup  {{ title.toUpperCase()}} is valid within the view templates, see the codepen. Creating filters and registering them with an angular app is a clean way to write reusable code.

You can experience the filter with the following titles ( top result by google for best books).greatest books

II- Encode Entities filter

This filter replace the angle brackets < and > with ‘&lt ;’ and ‘&gt ;’ and the quotes ” with ‘&quot ;’. This can be used to process HTML markup in order to be safely embedded in an html tag and prevent it from rendering as HTML but as raw HTML markup. As for the title case filter, the code is merely for exposition and does not enumerate all the possibilities. In the codepen below, we get raw html markup within a hidden element using innerHTML, we print it on the text area using ng-model, and we also print the transformed markup.